|
Resistance controllers |
|
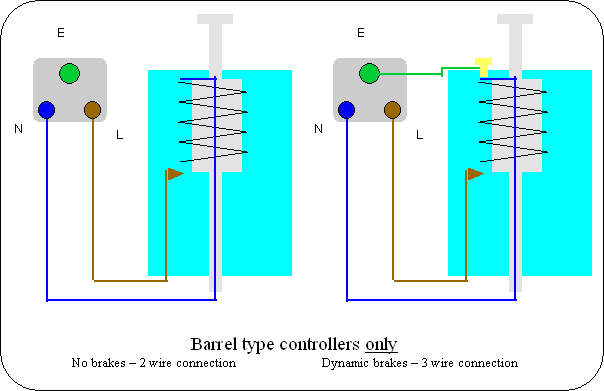
Above are the wiring diagrams for a normal modern plunger and trigger controllers with the
resistor fixed to the handle. Below are the wiring diagrams for controllers that have the resistor moving with the plunger, these need to be wired differently. The long obsolete "barrel" controllers from MRRC , VIP or Tradeship need to be wired this way. |
|
|
|
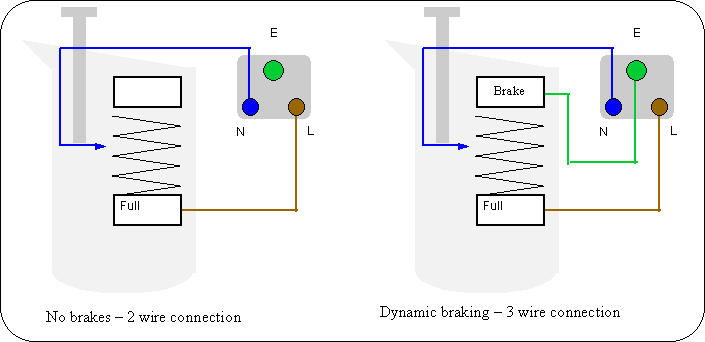
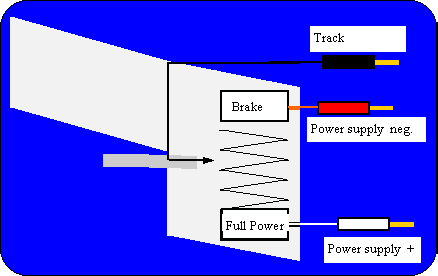
In their simplest form they consist of an off position where nothing is connected, and a variable resistance complete with a low resistance full power position. This allows the driver to stop the car or provide various amounts of power up to full power. These were used in the early days of slot racing, and some home sets controllers are still built this way. These have just 2 wires connecting them to the track (left hand diagram above). (Or just the black and white wire in the trigger diagram) In the improved form, controllers have the off position replaced by a brake terminal which connects the two pick up rails together. These have 3 wires connecting them to the track (right hand diagram above).. It should be noted that the resistance is connected to the full power band and is NOT connected to the brake band. Occasionally people describe these as rheostat controllers, this can lead to a misunderstanding about the connection to the brake band. If overheated the most common failure is the wire burning out near the full power band. This can be repaired by unwinding one turn and soldering the end on, or by replacing one turn with another piece of resistance wire. The resistance usually consists of a coil of resistance wire wound on a ceramic core. This is usually NiChrome wire - a nickel chromium alloy that had good resistance properties, is quite hard and will stand very high temperatures. Unfortunately NiChrome is not easy to solder. Satisfactory joints can be made by abrading the wire with fine emery paper, tinning immediately with an aggressive flux, then twisting the tinned wires together and flowing some more solder on the tinned wires. An alternative resistance wire is constantan - a copper nickel alloy with very good resistance properties (in particular its resistance changes very little with temperature). This is softer than NiChrome and much easier to solder. Before electronic controllers came into general use, adjustable resistance controllers were quite commonly used. Some designs had 2 or more resistors, some separated the contact and the resistors. These days electronic controllers provide the adjustability drivers want, rather better than could be achieved with resistors. With the exception of the more advanced resistance controllers sometimes used in HO scale slot racing, resistance controllers are now almost entirely the straight forward single resistor type which have the merits of low cost and simplicity. A frequently asked question is what value resistance controller / how many ohms do I need? (This is a non issue for adjustable electronic controllers - just twiddle the knob to give you whatever you need.) Unfortunately what value resistance controller you need may not have a single answer - you may need more than one.
So where do you start? I know some people will have different ideas, but as a starting point HO 60 to 120 ohms Basic home set 1/32 45 to 75 ohms Quicker home set type cars 15 to 45 ohms hard tyre cars with metal chassis 5 -15 ohms, Sponge tyre cars 2- 5 ohms.
|
Copyright © 2009 updated 2015, 2021 C.Frost All rights reserved